A frequently required feature in modern applications is being able to upload and download files. In this post, we're going to implement file uploads with ASP.NET Core and Angular. In future posts, I'll show you more sophisticated features such as drag & drop support, multiple file uploads, validation, and previews.
Getting Started
We're going to build a simple app that allows image file uploads, one at a time. The end result is going to look like this:

Let's set up a new project and go step by step. I'm using Visual Studio 2019 Community Edition, but you could use the .NET CLI or other IDEs (e.g. Rider). Open Visual Studio and create a new project. In the second screen, search for Angular in project templates:
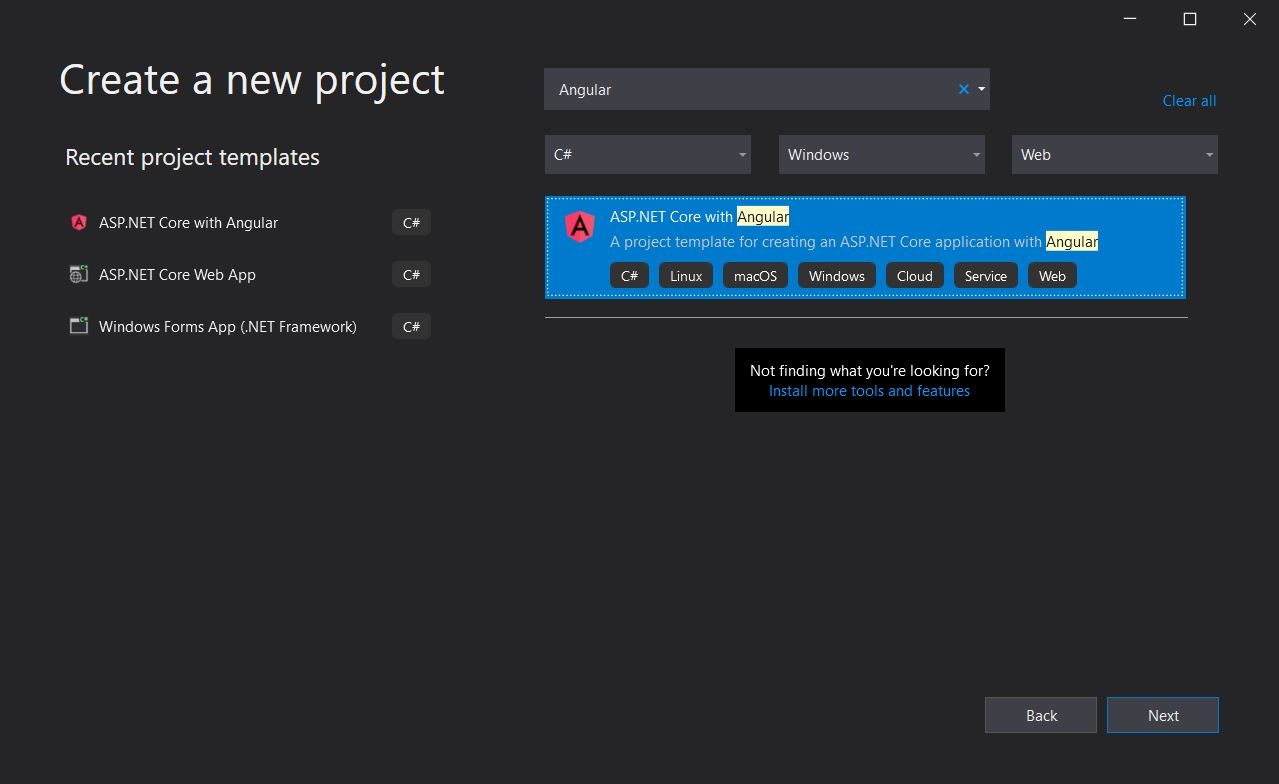
Select the ASP.NET Core with Angular template and click Next. Choose a name for your project and select the location directory:
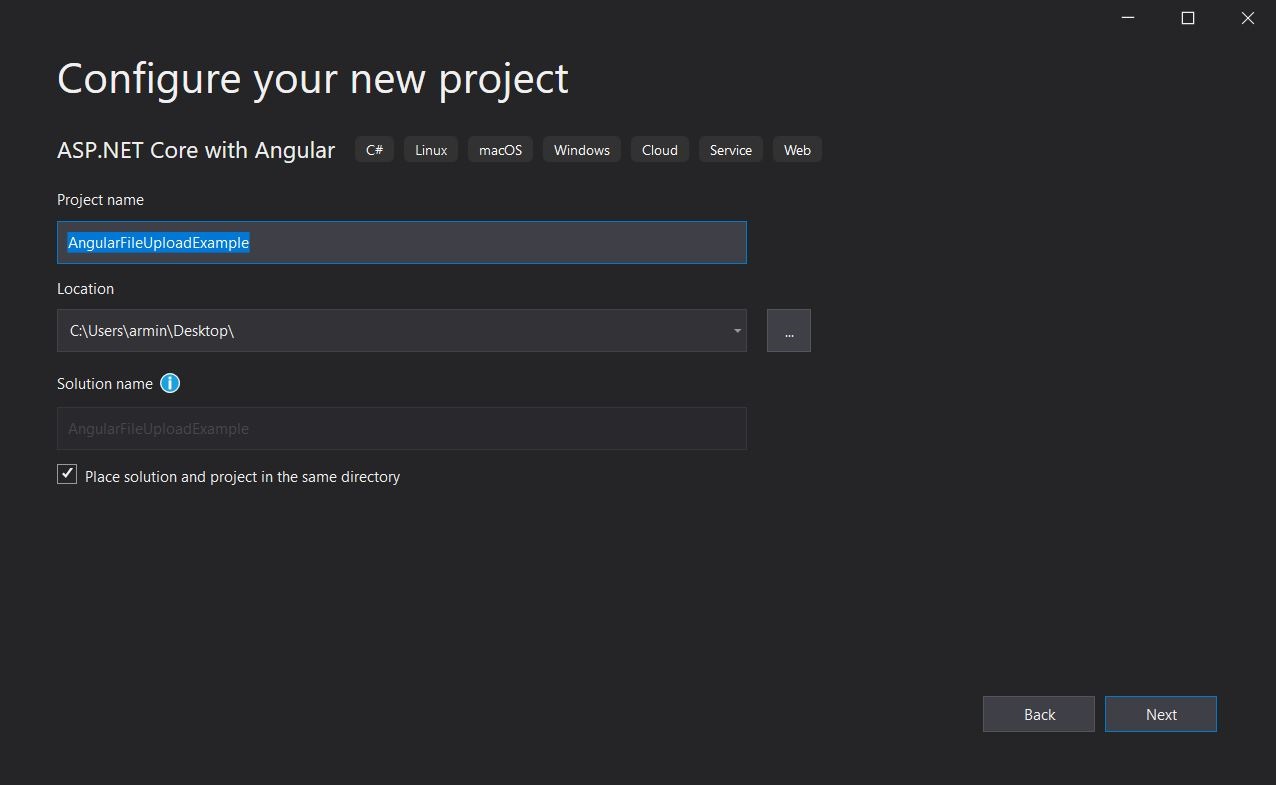
Click next and in the last screen, choose the target framework and set the Authentication Type to None. I'm going to use .NET 5.0:
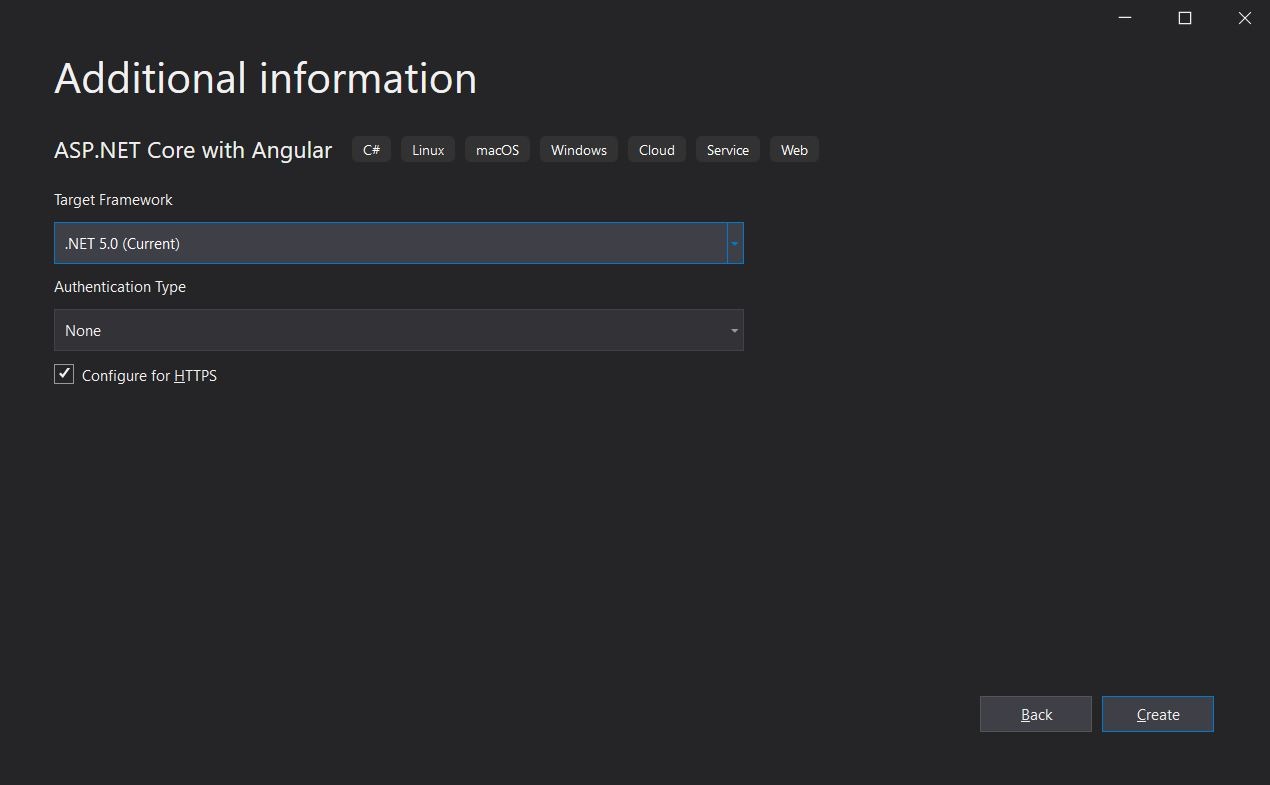
Click Create and voila, we have a new solution to work with. Next, let's update the Angular project and get rid of the redundant files. At the time of this writing, the project template is still using an old version of Angular (v8.2.12). The following screenshot shows the generated package.json file:
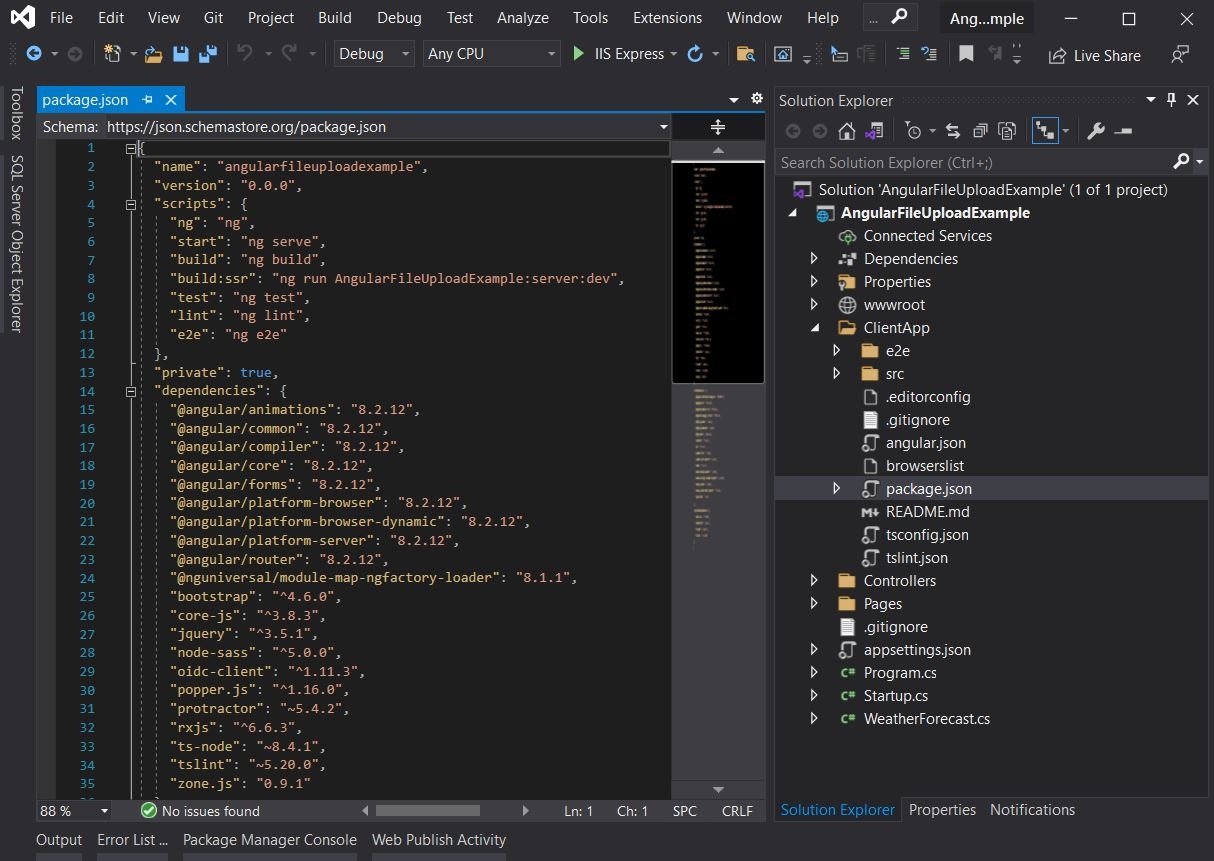
I have Angular 11.2.5 installed so I want the latest version. You could use the official Angular Update Guide but it's time-consuming and tricky to update the local version this way. I prefer a simpler approach, delete the ClientApp directory and create a new project from scratch. After you've deleted the ClientApp folder, open a terminal (PowerShell, Command-prompt) in the solution root directory and create a new Angular CLI project:
ng new ClientApp --style=scss --routing=falseThis will create a new project named ClientApp with SCSS for styling, and no routing to keep things simple. Before we get to the Angular app, let's remove some of the generated files:
- Remove
WeatherForecast.csfrom the project root directory - Remove
WeatherForecastController.csfrom the Controllers directory
We don't need the generated sample code, we want to have a blank solution to work with.
The Angular App
Let's set up the Angular app too, I'm using Visual Studio Code but feel free to use your favorite editor. Open the ClientApp folder in VSCode and install Bootstrap which I'm going to use for UI components:
npm install --save bootstrapGreat, now open src/styles.scss and import Bootstrap:
@import "~bootstrap/scss/bootstrap";I prefer importing the SCSS file because overriding Bootstrap variables and styles are easier this way. Alternatively, you could import just the CSS in angular.json:
"styles": [
  "node_modules/bootstrap/dist/css/bootstrap.min.css",
  "src/styles.scss"
]
On my machine, after creating this new Angular project I'm seeing that TypeScript v4.1.5 is installed. If you're using the same version or higher, you may want to disable the strictPropertyInitialization setting in tsconfig.json:
{
  "compilerOptions": {
    "strictPropertyInitialization": false,
  }
}
Lastly, let's add some Bootstrap styling to our app and move on to the implementation. Open src/index.html and replace the content with the following:
<!doctype html>
<html lang="en">
<head>
  <meta charset="utf-8">
  <title>Angular File Upload Example</title>
  <base href="/">
  <meta name="viewport" content="width=device-width, initial-scale=1">
  <link rel="icon" type="image/x-icon" href="favicon.ico">
</head>
<body>
  <div class="container">
    <main role="main">
      <app-root>loading...</app-root>
    </main>
  </div>
</body>
</html>
I've just changed the document title and wrapped the root element in a container.
The Back-end Implementation
We're going to need a couple of things for the back-end. First, we need to configure a PhysicalFileProvider so that we can access the uploaded files. Then we'll need an API controller with a single endpoint that actually uploads user files and stores them on disk. How you manage file uploads depends on your project requirements, and in future posts, I'll talk about security (authentication & authorization), performance considerations, and more. But let's stick to a basic demo for now. Open Startup.cs and insert the following in the Configure method:
public void Configure(IApplicationBuilder app, IWebHostEnvironment env)
{
  // removed for brevity

  app.UseStaticFiles();    // for the wwwroot folder

  // for the wwwroot/uploads folder
  string uploadsDir = Path.Combine(env.WebRootPath, "uploads");
  if (!Directory.Exists(uploadsDir))
      Directory.CreateDirectory(uploadsDir);

  app.UseStaticFiles(new StaticFileOptions()
  {
      RequestPath = "/images",
      FileProvider = new PhysicalFileProvider(uploadsDir)
  });

  // the rest of the method
}
The order is important here, make sure this code is inserted after the call to app.UseHttpsRedirection() and before the call to app.UseSpaStaticFiles(). So what are we doing here? We are registering two physical file providers for serving static files. The first one is for the wwwroot folder and doesn't require further configuration. Static assets like images, scripts, and stylesheets go under wwwroot by default. The second one needs some explanation.
Our sample app is going to allow image files to be uploaded, although the same code can be used for whatever file format. We're going to store uploaded files in the uploads directory, which is going to sit on the wwwroot folder.
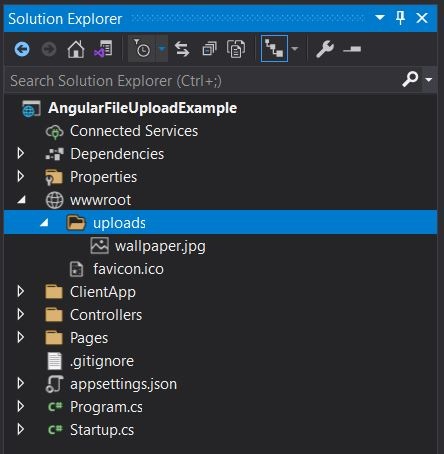
We want to display uploaded images, so the ASP.NET web app needs to be able to serve the uploads directory. To do that, we register a virtual path and a PhysicalFileProvider. The RequestPath property is set to "/images" and that means all files under the uploads directory are going to be served using that prefix. Say we have uploaded a file named wallpaper.jpg. On the file system, our file is stored at wwwroot/uploads/wallpaper.jpg. But to access it via the web app we'll use the file provider we created, so the path would be /images/wallpaper.jpg.
For more information have a look at File Providers in ASP.NET Core and Static Files in ASP.NET Core.
The Upload Controller
Right-click on the Controllers folder and create a new API Controller named UploadController. Controllers are just C# classes, so you could just create a new class. Here's the complete code:
using Microsoft.AspNetCore.Hosting;
using Microsoft.AspNetCore.Http;
using Microsoft.AspNetCore.Mvc;
using System;
using System.IO;
using System.Linq;
using System.Net.Http.Headers;
using System.Threading.Tasks;

namespace AngularFileUploadExample.Controllers
{
    [ApiController]
    [Route("api/[controller]")]
    [Produces("application/json")]
    public class UploadController : ControllerBase
    {
        private readonly IWebHostEnvironment _hostingEnvironment;

        public UploadController(IWebHostEnvironment hostingEnvironment)
        {
            _hostingEnvironment = hostingEnvironment;
        }

        [HttpPost]
        [DisableRequestSizeLimit]
        public async Task<IActionResult> UploadFile()
        {
            if (!Request.Form.Files.Any())
                return BadRequest("No files found in the request");

            if (Request.Form.Files.Count > 1)
                return BadRequest("Cannot upload more than one file at a time");

            if (Request.Form.Files[0].Length <= 0)
                return BadRequest("Invalid file length, seems to be empty");

            try
            {
                string webRootPath = _hostingEnvironment.WebRootPath;
                string uploadsDir = Path.Combine(webRootPath, "uploads");

                // wwwroot/uploads/
                if (!Directory.Exists(uploadsDir))
                    Directory.CreateDirectory(uploadsDir);

                IFormFile file = Request.Form.Files[0];
                string fileName = ContentDispositionHeaderValue.Parse(file.ContentDisposition).FileName.Trim('"');
                string fullPath = Path.Combine(uploadsDir, fileName);

                var buffer = 1024 * 1024;
                using var stream = new FileStream(fullPath, FileMode.Create, FileAccess.Write, FileShare.None, buffer, useAsync: false);
                await file.CopyToAsync(stream);
                await stream.FlushAsync();

                string location = $"images/{fileName}";

                var result = new
                {
                    message = "Upload successful",
                    url = location
                };

                return Ok(result);
            }
            catch (Exception ex)
            {
                return StatusCode(StatusCodes.Status500InternalServerError, "Upload failed: " + ex.Message);
            }
        }
    }
}
This controller is really simple, but let's quickly go through the code. The controller inherits from the ControllerBase and is decorated with three attributes. The Route attribute adds a prefix to the controller, so this controller would be accessed at api/upload. We're also using the Produces attribute to tell ASP.NET that this controller produces JSON responses.
In the constructor, we inject an instance of IWebHostingEnvironment which we're going to use for working with the file system. This controller has a single endpoint that accepts HTTP POST requests. You also notice that we're using the DisableRequestSizeLimit attribute which disables the request body size limit, look here for more information.
Input files can be accessed on the Request object. In the method body, we check for a few things:
- If there are no files on the request, return
BadRequest(HTTP 400) - If there's more than one file, return
BadRequest If the file is empty (content length <= 0), return
BadRequest
To keep things simple, we're allowing files to be uploaded one at a time. But you could make a few changes and allow multiple files. The try/catch block is where we actually upload files. First, we get the directory path for the wwwroot folder. Next, we check whether the uploads directory exists or not. If not, we create the directory. Then we get the destination path using the input file's name and store it on disk using a FileStream. Finally, we return an anonymous object with two properties:
- Message - a success message
- URL - the uploaded file's URL
There are many things you could do with this method. For instance, if your application only allows a particular set of file formats, you could validate file extensions before storing them. Or let's say users can't upload files larger than 10 MB, you could check the content length and reject invalid files. Perhaps you want to run a virus scanner too? You get the idea.
The Front-end Implementation
The first thing we need is to import the HttpClientModule. Open app.module.ts and replace it with the following:
import { NgModule } from '@angular/core';
import { BrowserModule } from '@angular/platform-browser';
import { FormsModule } from '@angular/forms';
import { HttpClientModule } from '@angular/common/http';

import { AppComponent } from './app.component';

@NgModule({
  declarations: [AppComponent],
  imports: [BrowserModule, FormsModule, HttpClientModule],
  providers: [],
  bootstrap: [AppComponent],
})
export class AppModule {}
We also want to introduce the API URL as an environment variable, so open environment.ts and replace it with the following:
export const environment = {
  production: false,
  apiUrl: 'https://localhost:5001/api',
};
Don't forget to do the same for environment.prod.ts in production.
The component template is very simple. We're going to have three rows with basic HTML elements. Open app.component.html and replace it with the following:
<div class="row mt-5">
  <div class="col">
    <div class="custom-file">
      <input type="file" accept="image/*" class="custom-file-input" id="customFile" (change)="handleFileInput($any($event.target).files)" [disabled]="working">
      <label class="custom-file-label" for="customFile">{{ uploadFileLabel }}</label>
    </div>
  </div>
  <div class="col-auto pl-sm-0">
    <button type="button" class="btn btn-outline-primary" ngbTooltip="Upload" (click)="upload()" [disabled]="working">Upload</button>
  </div>
</div>
<div class="row mt-3" *ngIf="working">
  <div class="col">
    <div class="progress">
      <div class="progress-bar" role="progressbar" [ngStyle]="{ 'width': uploadProgress + '%' }" [attr.aria-valuenow]="uploadProgress" aria-valuemin="0" aria-valuemax="100">{{ uploadProgress }}%</div>
    </div>
  </div>
</div>
<div class="row mt-3" *ngIf="uploadUrl?.length">
  <div class="col">
    <img [src]="uploadUrl" alt="preview" class="rounded shadow w-100">
  </div>
</div>
On the first row, we have a file input and a button. They both get disabled while the app is working (uploading). On the second row, we have a Bootstrap progress bar that shows the upload progress. And finally, we have an image element that is displayed after a successful upload, pointing to the URL we received from the API.
Lastly, let's wire up the UI to our API. Open app.component.ts and replace it with the following:
import { HttpClient, HttpEventType, HttpRequest } from '@angular/common/http';
import { Component } from '@angular/core';
import { environment } from 'src/environments/environment';

@Component({
  selector: 'app-root',
  templateUrl: './app.component.html',
  styleUrls: ['./app.component.scss'],
})
export class AppComponent {
  constructor(private http: HttpClient) {}

  working = false;
  uploadFile: File | null;
  uploadFileLabel: string | undefined = 'Choose an image to upload';
  uploadProgress: number;
  uploadUrl: string;

  handleFileInput(files: FileList) {
    if (files.length > 0) {
      this.uploadFile = files.item(0);
      this.uploadFileLabel = this.uploadFile?.name;
    }
  }

  upload() {
    if (!this.uploadFile) {
      alert('Choose a file to upload first');
      return;
    }

    const formData = new FormData();
    formData.append(this.uploadFile.name, this.uploadFile);

    const url = `${environment.apiUrl}/upload`;
    const uploadReq = new HttpRequest('POST', url, formData, {
      reportProgress: true,
    });

    this.uploadUrl = '';
    this.uploadProgress = 0;
    this.working = true;

    this.http.request(uploadReq).subscribe((event: any) => {
      if (event.type === HttpEventType.UploadProgress) {
        this.uploadProgress = Math.round((100 * event.loaded) / event.total);
      } else if (event.type === HttpEventType.Response) {
        this.uploadUrl = event.body.url;
      }
    }, (error: any) => {
      console.error(error);
    }).add(() => {
      this.working = false;
    });
  }
}
Let's examine the code. When you select a file, the handleFileInput method is called. This method accepts a FileList as an argument, and if the collection is not empty, we get the first item. Similar to the upload controller, this is where you can validate input files on the client-side. Say you wanted to allow certain extensions, or reject files larger than 10 MB, etc.
The upload method is straightforward too. First, we check whether we have an input file or not. If we do, we instantiate a new FormData and append the selected file to it. Next, we create an HttpRequest pointing to our API endpoint, and we set the reportProgress property to true. This is important, otherwise, you wouldn't be able to show the upload progress. Before we send the request, we reset the variables, the uploadUrl and uploadProgress properties. Finally, we send the request and subscribe to it. HttpClient.request returns an Observable. Inside the observable subscription, we check the event type. If it is UploadProgress, we update the uploadProgress variable. If the event type is Response, it means the request has been processed successfully and we have received a response (the anonymous object returned from our API).
That's it, we have a working file upload example. I'll leave it to you to develop this further and play with it. One thing to bring to your attention here is that even though you could use this implementation in many applications, it's not perfect. If you're expecting thousands of concurrent users and large file uploads, and if you need advanced security features too, you may need a more sophisticated solution like streaming the data in chunks and storing them asynchronously. Or you could leave the file system alone and go for MinIO or Azure Blob Storage.
Source Code
You can find the complete code on Github. Happy coding.
