
Angular Router Fade Animation
Animations can greatly improve the user experience of your applications. In this short tutorial, I'll show you how to use Angular's Animations API to create a simple fade-in/fade-out animation for routing transitions.
Getting Started
We're going to build a simple app with two routes, and apply a fade animation to router transitions. The end result is going to look like this:
Let's start by creating a new project. Make sure you have Node.js, NPM, and Angular CLI installed. I'm using the following versions:
- node v12.19.0
- npm v6.14.8
- Angular CLI v11.2.6
ng new ng-router-fade-animation --style=scss --routing=trueThis will create a new project named ng-router-fade-animation with SCSS styling and routing enabled. I'm going to use Bootstrap for a basic layout and UI components too:
npm install --save bootstrapImport Bootstrap in src/styles.scss:
@import "~bootstrap/scss/bootstrap";Finally, replace the index.html file with the following:
<!doctype html>
<html lang="en">
<head>
  <meta charset="utf-8">
  <title>Angular Routing Fade Animation</title>
  <base href="/">
  <meta name="viewport" content="width=device-width, initial-scale=1">
  <link rel="icon" type="image/x-icon" href="favicon.ico">
</head>
<body>
  <app-root>loading...</app-root>
</body>
</html>
I'm assuming you have basic knowledge of Angular routing and components, let's get right to it.
Set up the routes
When you create a new project with routing enabled using Angular CLI, it generates an app-routing.module.ts file for you. To keep things simple, let's remove that and define our routes directly in the app.module.ts file instead.
import { NgModule } from '@angular/core';
import { BrowserModule } from '@angular/platform-browser';
import { BrowserAnimationsModule } from '@angular/platform-browser/animations';
import { RouterModule, Routes } from '@angular/router';

import { AppComponent } from './app.component';
import { HomeComponent } from './pages/home/home.component';
import { AboutComponent } from './pages/about/about.component';

const routes: Routes = [
  { path: '', pathMatch: 'full', component: HomeComponent },
  { path: 'home', component: HomeComponent },
  { path: 'about', component: AboutComponent },
];

@NgModule({
  imports: [
    BrowserModule,
    BrowserAnimationsModule,
    RouterModule.forRoot(routes, { useHash: true }),
  ],
  declarations: [AppComponent],
  bootstrap: [AppComponent],
})
export class AppModule {}
Note that we're importing the BrowserAnimationsModule too. So we have two simple routes, home and about. Create a folder named pages under the src/app directory, and create a folder for each route. Alternatively, you could generate the components using the Angular CLI:
ng generate component pages/home
ng generate component pages/about
Both components are simple placeholders, nothing special. Here's the home component template:
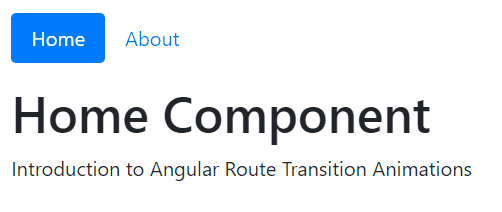
<div class="row">
  <div class="col">
    <h1>Home Component</h1>
    <p>Introduction to Angular Route Transition Animations</p>
  </div>
</div>
And the component declaration:
import { Component } from '@angular/core';

@Component({
  selector: 'app-home',
  templateUrl: './home.component.html',
})
export class HomeComponent {}
The about component is similar, here's the template:
<div class="row">
  <div class="col">
    <h1>About Component</h1>
    <p>Fade Animation for Angular Routed Components</p>
  </div>
</div>
And the component declaration:
import { Component } from '@angular/core';

@Component({
  selector: 'app-about',
  templateUrl: './about.component.html',
})
export class AboutComponent {}
Now that we have our routes, we need a router outlet and some UI for navigation.
The App Component
Open app.component.html and replace it with the following:
<div class="container">
  <header class="my-3">
    <ul class="nav nav-pills">
      <li class="nav-item">
        <a class="nav-link" [routerLink]="['/']" routerLinkActive="active"
          [routerLinkActiveOptions]="{ exact: true }">Home</a>
      </li>
      <li class="nav-item">
        <a class="nav-link" [routerLink]="['/about']" routerLinkActive="active">About</a>
      </li>
    </ul>
  </header>

  <main role="main">
    <router-outlet></router-outlet>
  </main>
</div>
Basic stuff, we have a container and a navigation component with two links. The routerLinkActive attribute sets the active class on each link when the corresponding route is activated.
Creating the Fade Animation
Create a file named animations.ts under the src/app directory. We'll define our animation here:
import {
  trigger,
  animate,
  transition,
  style,
  query,
} from '@angular/animations';

export const fadeAnimation = trigger('fadeAnimation', [
  transition('* => *', [
    query(':enter', [style({ opacity: 0, position: 'absolute' })], {
      optional: true,
    }),
    query(
      ':leave',
      [
        style({ opacity: 1 }),
        animate('0.3s', style({ opacity: 0, position: 'absolute' })),
      ],
      { optional: true }
    ),
    query(
      ':enter',
      [
        style({ opacity: 0 }),
        animate('0.3s', style({ opacity: 1, position: 'relative' })),
      ],
      { optional: true }
    ),
  ]),
]);
This tutorial is a quick introduction, Angular Animations are comprehensive and powerful, make sure to read the official docs to learn more. Let's see what we're doing here.
The * => * in the transition function will trigger the animation between any two states. The query function has three parameters:
- event - the first parameter is the event (enter, leave, etc.). so the first query applies to entering a route, or when the component is added to the DOM.
- style - the second parameter is an array of styles or animations to apply.
- config - the third parameter is a configuration option. we're setting the
optionalproperty to true, to signal Angular that the animation may not apply since the component may or may not be in the DOM.
We have defined three animation queries, all of which are optional. We're using the :enter and :leave events to create a fade animation:
- When entering a route, set the opacity of the component to 0.
- When leaving the route, set the opacity to 1 and animate it for 0.3 seconds.
- Again, when entering the route, set the opacity to 0 and animate it for 0.3 seconds.
Notice that the first two queries set the position to absolute, but the last one (the second :enter event) sets the position to relative. This is important if you're using a UI library like Bootstrap or have your own design system, otherwise, an absolute position could break your UI.
Now that we have defined our animation, we need to explicitly specify what element it's going to apply to. Go back to app.component.html and change the router outlet:
<main role="main" [@fadeAnimation]="outlet.isActivated ? outlet.activatedRoute : ''">
  <router-outlet #outlet="outlet"></router-outlet>
</main>
We're creating a template reference to the outlet directive, with the variable assignment #outlet="outlet". With this reference, we can determine when the router outlet is active to trigger our fade animation. The last step is to register the animation with the app component. Open app.component.ts and add the animations array:
import { Component } from '@angular/core';
import { fadeAnimation } from './animations';

@Component({
  selector: 'app-root',
  templateUrl: './app.component.html',
  styleUrls: ['./app.component.scss'],
  animations: [fadeAnimation],
})
export class AppComponent {}
Voila, we have a fade animation for router transitions.
A Note On Unit Testing
For unit testing, import the NoopAnimationsModule instead of the BrowserAnimationsModule. This fulfills the contracts while isolating unit tests from having to deal with the transitions.
Animations Affect User Experience
Have you ever seen a PowerPoint presentation that had a thousand different transitions, fonts, and colors? Yikes, don't that. Keep your transitions simple and consistent to avoid confusing or overwhelming your users. Plus, fancy animations directly affect the performance of your applications.
Source Code
I've put up a live demo for you to play with. You can find a working example on StackBlitz, or get the complete code from Github. Happy coding.
Updated at Thu Apr 1, 2021
Shakir Ahmd 2/19/2024
Awesome!