
Working with Google Maps in Angular
read Mar 25, 2021 7965 reads No comments
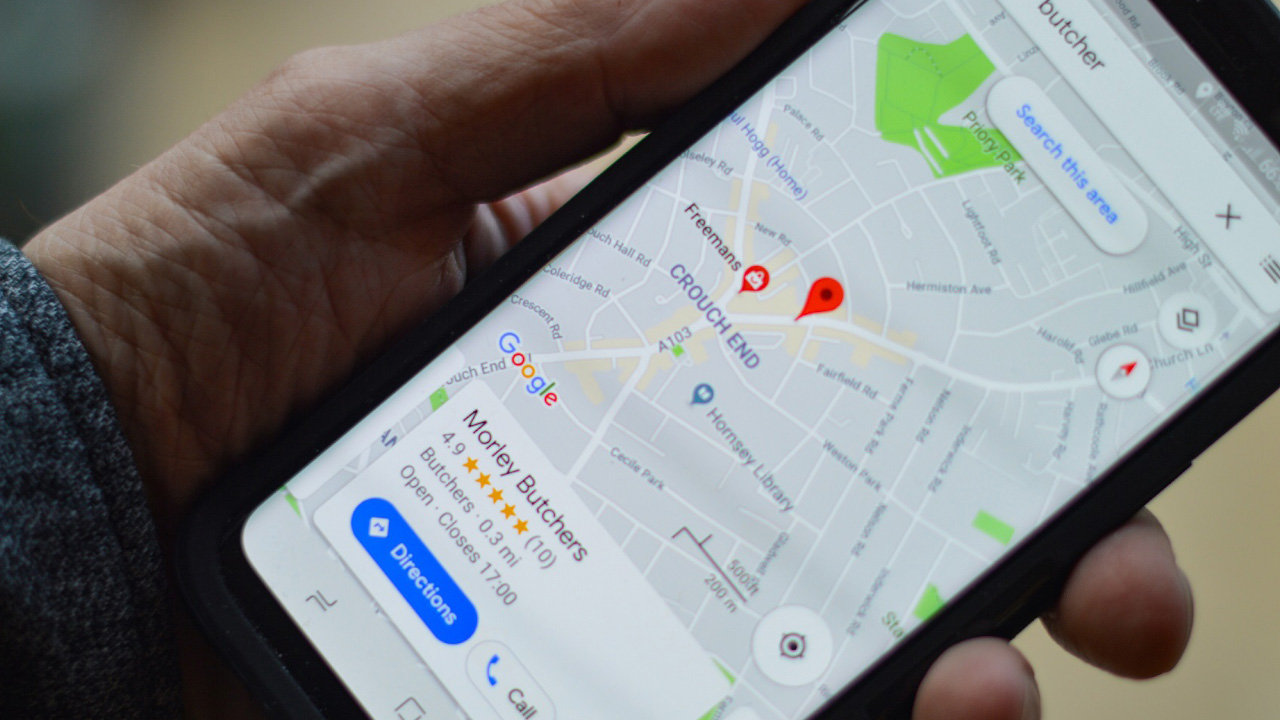
In the old days (before Angular 2+) if you wanted to work with Google Maps, you had to use the Maps JavaScript API directly. Fortunately, the Angular team has developed great component libraries to make life easier. We're going to use the official google-maps library which is available open-source. Bear in mind that you don't have to do it this way, you could just use the JavaScript API without using this library, but unless you have a good reason to, why bother?
Getting Started
Make sure you have Node.js, NPM, and the Angular CLI installed. I'm using the following versions:
- node v.12.19.0
- npm 6.14.8
- Angular CLI v11.2.5
First, let's create a basic Angular project:
ng new ng-google-maps-example --style=scss --routing=falseThis will create a project named ng-google-maps-example with SCSS for styling and no routing to keep things simple. Next, let's install the dependencies.
I'm going to install the following packages:
- Bootstrap - for UI components
- ngx-toastr - for toast notifications
- @angular/google-maps - the official google maps library from the Angular team
npm install --save bootstrap ngx-toastr @angular/google-mapsWe also need the type definitions for google maps:
npm install --save-dev @types/googlemapsGreat, we have what we need in place. If you serve the project (npm start) everything should work fine. But in case you get errors about the google namespace not being found, make sure the typings are imported correctly. Open tsconfig.app.json in the project root directory, and add the types collection under compilerOptions:
"compilerOptions": {
  // ...
  "typeRoots": ["node_modules/@types"],
  "types": ["googlemaps"]
}
Another thing you may run into is the TypeScript compiler throwing warnings at you about property initialization. To resolve that, you can open tsconfig.json in the root directory, and disable the strictPropertyInitialization option under compilerOptions:
"compilerOptions": {
  // ...
  "strictPropertyInitialization": false,
}
Next, we'll import Bootstrap in styles.scss:
@import "~bootstrap/scss/bootstrap";I prefer importing the SCSS file because overriding Bootstrap's variables and styles is easier this way. Alternatively, you could import the CSS file. To do that, open angular.json in the root directory, find the architect/build/options node and add the file to the styles collection:
"styles": [
  "node_modules/bootstrap/dist/css/bootstrap.min.css",
  "src/styles.scss"
]
Note that Bootstrap is imported before styles.scss, otherwise, your overrides won't take effect.
Loading the Google Maps API
Before we continue, you need to follow these steps to grab an API key that can be used to load Google Maps. It's worth mentioning that as of June 11th, 2018 it is now mandatory to have a billing account for your API keys to work properly. You can create your projects and credentials and use them for development purposes, but you'll notice that the Google Map will throw you warnings, and some services like the Geocoding API won't work at all and return error responses. But worry not, once you add the billing information, Google gives you about $200 worth of credit. Plus, if you stay below the free rate limits (about 5000 requests per month, if I remember correctly) you won't be charged.
Once you have your API key you can load Google Maps in two different ways:
- Load the JavaScript API in
index.html - Or lazy load the API using Angular
To keep things simple, we'll use the first approach. Update your index.html file with the following markup:
<!doctype html>
<html lang="en">
  <head>
    <meta charset="utf-8">
    <meta name="viewport" content="width=device-width, initial-scale=1, shrink-to-fit=no">
    <title>Angular Google Maps</title>
  </head>
  <body>
    <div class="container">
      <main role="main" class="py-2">
        <app-root>loading...</app-root>
      </main>
    </div>

    <script src="https://maps.googleapis.com/maps/api/js?key=YOUR_API_KEY&libraries=visualization"></script>
  </body>
</html>
Replace YOUR_API_KEY with the API key you have created on Google. Now let's import the required modules into our app. Open src/app/app.module.ts and update the code with the following:
import { NgModule } from '@angular/core';
import { BrowserModule } from '@angular/platform-browser';
import { GoogleMapsModule } from '@angular/google-maps';
import { ToastrModule } from 'ngx-toastr';

import { AppComponent } from './app.component';

@NgModule({
  declarations: [AppComponent],
  imports: [
    BrowserModule,
    GoogleMapsModule,
    ToastrModule.forRoot({
      preventDuplicates: false,
      progressBar: true,
      countDuplicates: true,
      extendedTimeOut: 3000,
      positionClass: 'toast-bottom-right',
    }),
  ],
  providers: [],
  bootstrap: [AppComponent],
})
export class AppModule {}
We've imported the GoogleMapsModule and ToastrModule. So far so good, now we can develop our app component.
The App Component
Open app.component.html and add the following markup:
<p *ngIf="loading">Getting your location...</p>

<div class="google_map_container">
  <!-- the google map component goes here -->
</div>
We have a loading indicator that is displayed when the app is busy getting your current location. Then we have a container where the google map component goes. Before we get to the component code, we need some styling. Open app.component.scss and add the following rules:
::ng-deep .google_map_container {
  width: 100%;
  display: block;

  .map-container {
    width: 100% !important;
    border-radius: 4px !important;
  }
}
The ::ng-deep directive may not be necessary, but if your component is using view encapsulation, this ensures the element is targeted correctly. Nothing special here, we just set the container element to be displayed as a block, spanning the full width of its parent container. The .map-container class is interesting. The Google Maps API injects a live map into our view, and the container element for the map instance has the map-container class. So we target that and set the width and border-radius properties, just for nice. Moving on with the component code.
Open app.component.ts and add update the file using the following code:
import { Component, OnInit, ViewChild } from '@angular/core';
import { GoogleMap, MapInfoWindow, MapMarker } from '@angular/google-maps';
import { ToastrService } from 'ngx-toastr';

@Component({
  selector: 'app-root',
  templateUrl: './app.component.html',
  styleUrls: ['./app.component.scss'],
})
export class AppComponent implements OnInit {
  constructor(private toastr: ToastrService) {}

  loading = false;

  @ViewChild(GoogleMap, { static: false }) map: GoogleMap;
  @ViewChild(MapInfoWindow, { static: false }) infoWindow: MapInfoWindow;

  mapZoom = 12;
  mapCenter: google.maps.LatLng;
  mapOptions: google.maps.MapOptions = {
    mapTypeId: google.maps.MapTypeId.ROADMAP,
    zoomControl: true,
    scrollwheel: false,
    disableDoubleClickZoom: true,
    maxZoom: 20,
    minZoom: 4,
  };

  markerInfoContent = '';
  markerOptions: google.maps.MarkerOptions = {
    draggable: false,
    animation: google.maps.Animation.DROP,
  };
}
We have defined the properties that we're going to need. The loading property is used to display the loading indicator we saw earlier. The GoogleMap and MapInfoWindow properties use the @ViewChild directive to reference the Google Map objects injected into the view. As you can see, instead of using a string identifier, we're using the object types here. Then we have a list of properties used to configure the map:
mapZoom- an integer for the zoom value.mapCenter- aLatLngobject that we'll use to center the map on.mapOptions- aMapOptionsobject used for configuring various aspects of the map (map type, controls, etc.). Make sure to check out the JavaScript API for more information.markerInfoContent- this variable is used to set the marker's popup content.markerOptions- aMarkerOptionsobject used for configuring the marker.
Now we need to insert the google-map component. Open app.component.html and update the markup:
<p *ngIf="loading">Getting your location...</p>
<div class="google_map_container">
  <google-map [zoom]="mapZoom" [center]="mapCenter" [options]="mapOptions">
    <map-marker
      #marker="mapMarker"
      [position]="mapCenter"
      [options]="markerOptions"
      (mapClick)="openInfoWindow(marker)">
    </map-marker>
    <map-info-window>{{ markerInfoContent }}</map-info-window>
  </google-map>
</div>
As you can see, the properties we defined are bound to the component using Angular's two-way data binding. You also notice that the map-marker component is a child of the google-map component. So we have a google map instance, bound to a number of properties (zoom level, center position, and options), and we have a marker instance that when clicked, should open a popup (InfoWindow). Now we need the actual code for getting the current location and updating the map. If you pay attention to the AppComponent's definition, you see that it implements the OnInit interface. Let's create the methods we need first, then write the actual code. Open app.component.ts and add the following:
ngOnInit() {
  this.getCurrentLocation();
}

openInfoWindow(marker: MapMarker) {
  // this is called when the marker is clicked.
  this.infoWindow.open(marker);
}

getCurrentLocation() {
  // this method gets the current location and updates the map.
}
When the AppComponent loads we call the getCurrentLocation method. We're going to use the navigator.geolocation feature which is available in virtually all modern browsers. Here's the method body:
getCurrentLocation() {
  this.loading = true;

  navigator.geolocation.getCurrentPosition(
    (position: GeolocationPosition) => {
      this.loading = false;

      const point: google.maps.LatLngLiteral = {
        lat: position.coords.latitude,
        lng: position.coords.longitude,
      };

      this.mapCenter = new google.maps.LatLng(point);
      this.map.panTo(point);

      this.markerInfoContent = "I'm here!";

      this.markerOptions = {
        draggable: false,
        animation: google.maps.Animation.DROP,
      };
    },
    (error) => {
      this.loading = false;

      if (error.PERMISSION_DENIED) {
        this.toastr.error("Couldn't get your location", 'Permission denied');
      } else if (error.POSITION_UNAVAILABLE) {
        this.toastr.error(
          "Couldn't get your location",
          'Position unavailable'
        );
      } else if (error.TIMEOUT) {
        this.toastr.error("Couldn't get your location", 'Timed out');
      } else {
        this.toastr.error(error.message, `Error: ${error.code}`);
      }
    },
    { enableHighAccuracy: true }
  );
}
Let's go through the code. The first thing we do is set the loading property to true, which is going to display our loading indicator. Next, we call the getCurrentPosition method on the navigator.geolocation object. You could write a one-liner to check whether the browser supports this feature or not, before attempting to get the current position. Something like this:
if (!navigator.geolocation) {
  alert('Your browser does not support the geolocation feature');
}
The getCurrentPosition method has the following signature:
Geolocation.getCurrentPosition(successCallback: PositionCallback, errorCallback?: PositionErrorCallback | undefined, options?: PositionOptions | undefined): voidAs you can see, the errorCallback and the options argument are optional, and the method doesn't return anything. The PositionOptions allows you to configure the following properties:
- enableHighAccuracy
- maximumAge
- timeout
Our method uses high accuracy and defines both a success and an error handler. Let's examine the success handler.
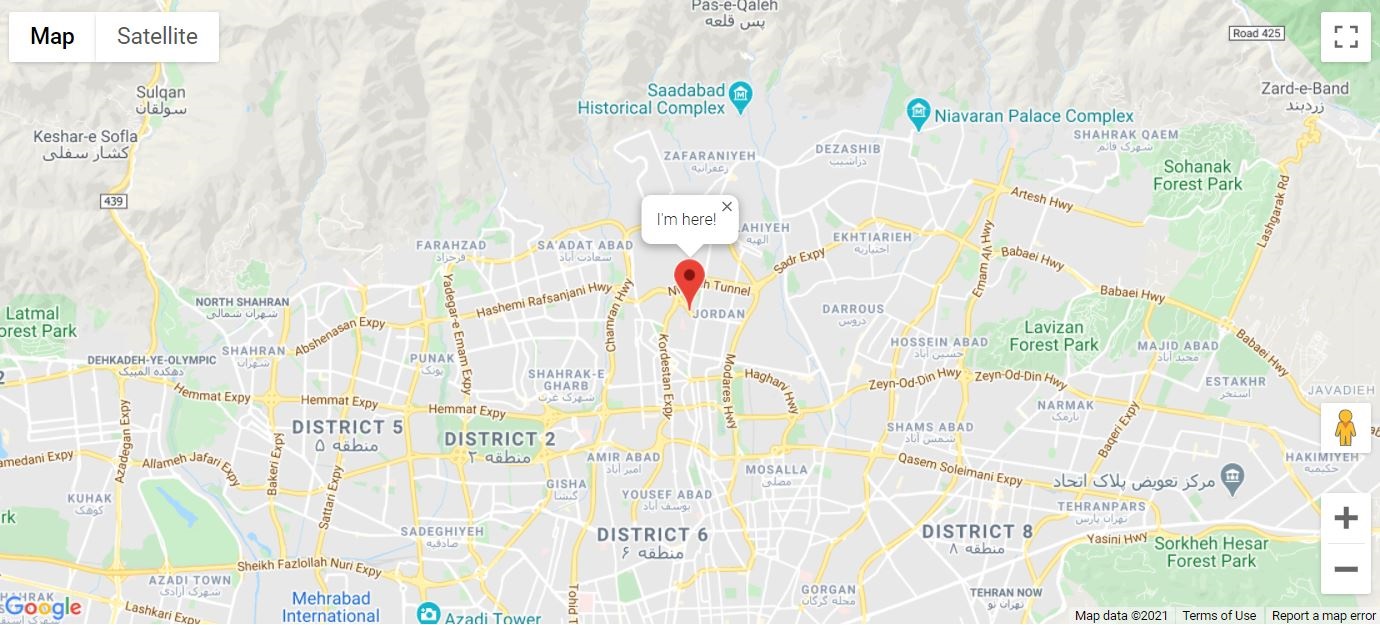
Inside the success handler, we set the loading property to false, because if successful, we have gotten a GeolocationPosition. Next, we create a google.maps.LatLngLiteral object from the coordinates we have received:
const point: google.maps.LatLngLiteral = {
  lat: position.coords.latitude,
  lng: position.coords.longitude,
};
Now we can update the map and display the current position. We set the mapCenter property to a new google.maps.LatLng object, we call the panTo method on the map to bring the center position into view, and finally, we set the marker's InfoWindow content:
this.mapCenter = new google.maps.LatLng(point);
this.map.panTo(point);

this.markerInfoContent = "I'm here!";

this.markerOptions = {
  draggable: false,
  animation: google.maps.Animation.DROP,
};
If you run the project and your browser successfully gets your current position, you should see a live map with a marker centered on your location.
The error callback is straightforward, we just display a message for each error reason:
if (error.PERMISSION_DENIED) {
  this.toastr.error("Couldn't get your location", 'Permission denied');
} else if (error.POSITION_UNAVAILABLE) {
  this.toastr.error(
    "Couldn't get your location",
    'Position unavailable'
  );
} else if (error.TIMEOUT) {
  this.toastr.error("Couldn't get your location", 'Timed out');
} else {
  this.toastr.error(error.message, `Error: ${error.code}`);
}
That's it! We have a working google map. In future posts, I'll develop this app further and integrate it with the Google Geocoding API. Happy coding.
You can find the source code for this post on Github.
Updated at Mar 25, 2021
